This blog is a continuation of my previous blog where I talked about making a Game Design Document with Thomas for the game which he wanted to make! I recommend that you read that one before this.
As mentioned on the previous blog, Thomas was able to pick a what order he wanted to take certain modules in this course, so once he completed his GDD, he had the choice of doing Design or Art, and so he picked to do design first, In this blog, I go through some of the stuff we did in the Design sessions!
Greyboxing was a new concept for Thomas, so to help him understand what it was, we spent some time looking through Greybox examples, and explaining their purpose, as well as looking at some blog posts which discuss other people's greyboxing.
Greybox For Hub
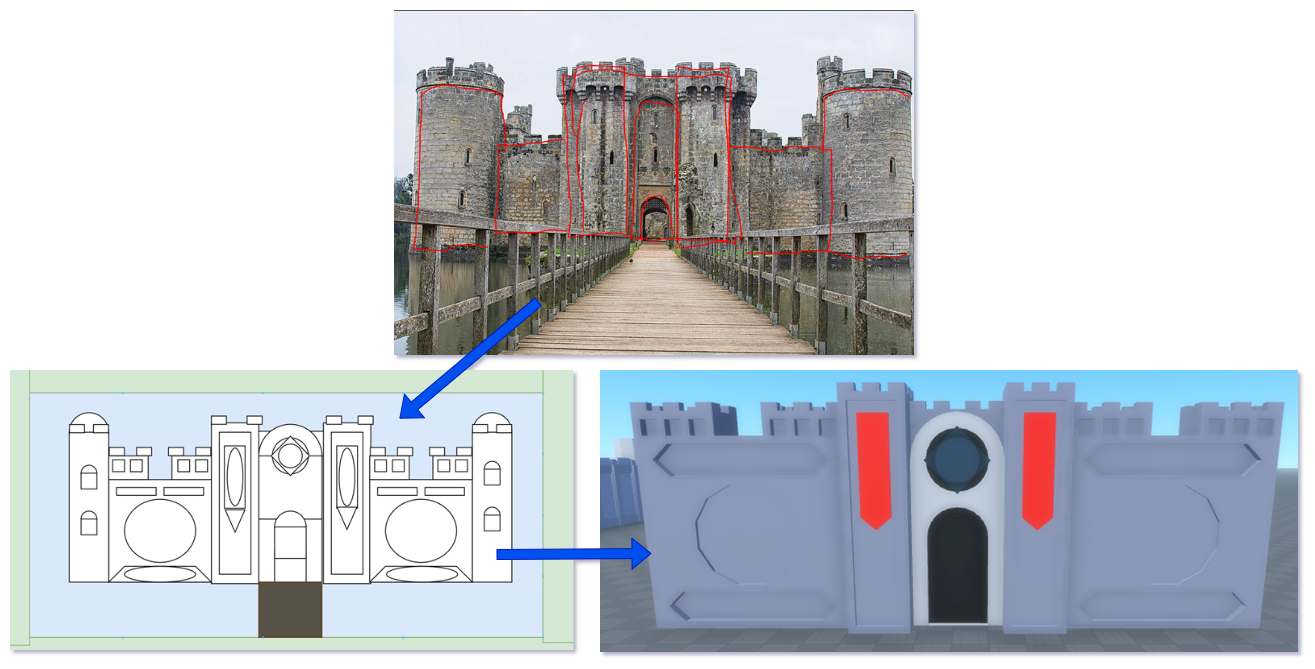
We started the hub by doing some research into the scenery in different games. Thomas had a mood board of images for his game maps (City, Sea, and Space) on his GDD, but these didn’t cover areas like the main hub! So, we went into a few different Roblox games, we also began to write down a list of things/objects which he liked from these games, for example, we looked at Roblox’s Flood Escape game’s hub world to see how it works, where the player spawns, the different things they can do in the hub, and the contents of the hub, and we took pictures of the models in Lumbridge Castle as that was the style of the castle that Thomas wanted in his hub world.
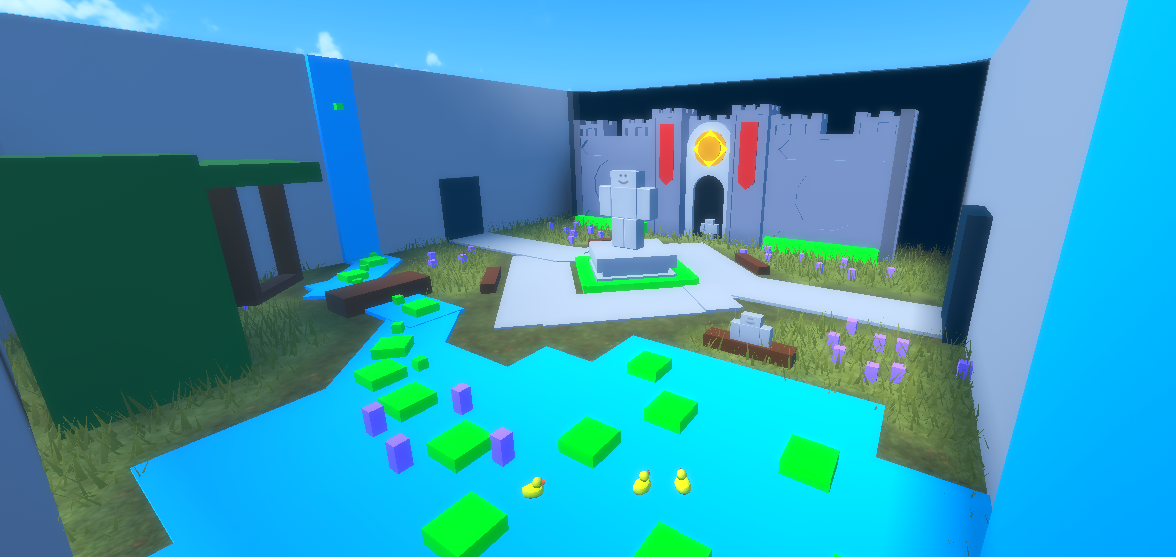
In his own time, he found an image of a castle he really liked and began to block it out in Draw.io, and I thought this looked really nice! He then blocked this out in Roblox, and this was where he started with the outside hub world.
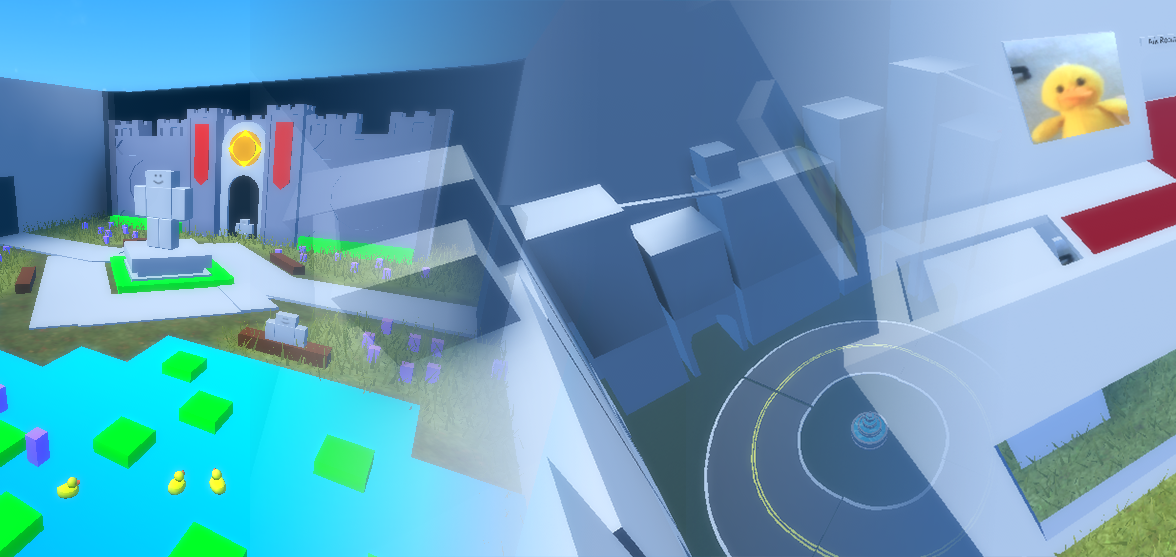
From here, in our session, Thomas made a Greybox for the outside hub world, using the castle as a starting point. Once he was done with the greybox, we put a spawning point inside of it, spawned our characters into the hub, discussed what he liked and disliked, wrote down the pros and cons, and then started a new, improved one! We did this a few times and reached a final grey box which he really liked the look of!
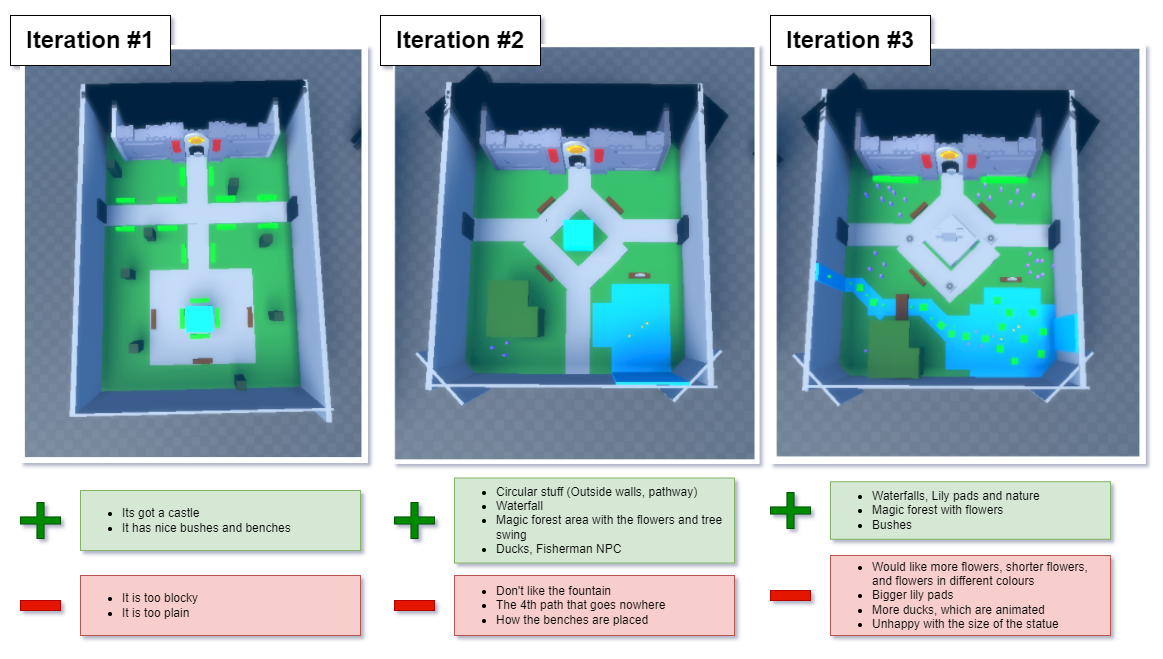
Doing it this way allows Thomas to experiment with different ideas, compare these ideas side by side, improve with each iteration, and eventually have something which he really likes!
Greybox For Inside Hub
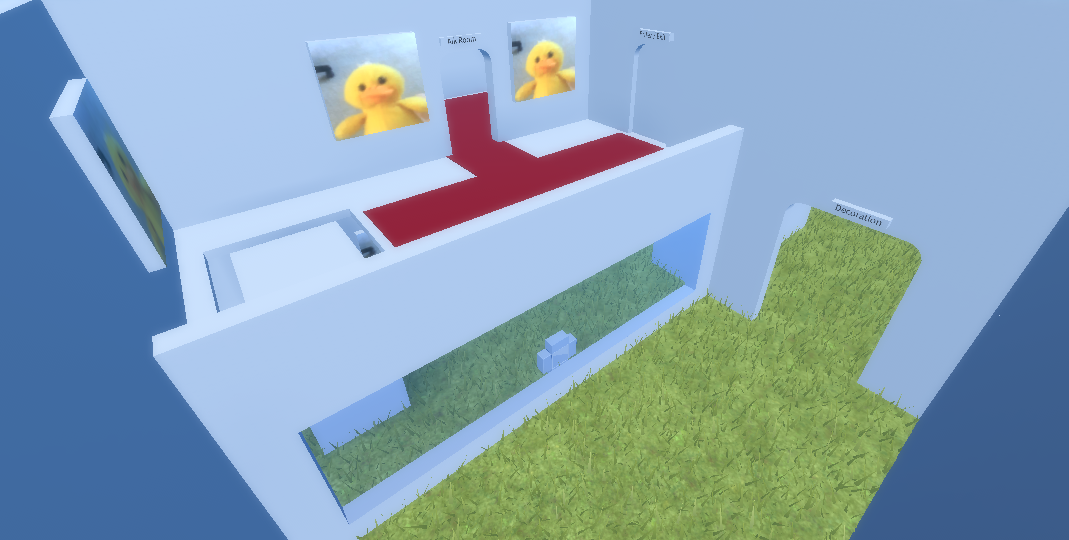
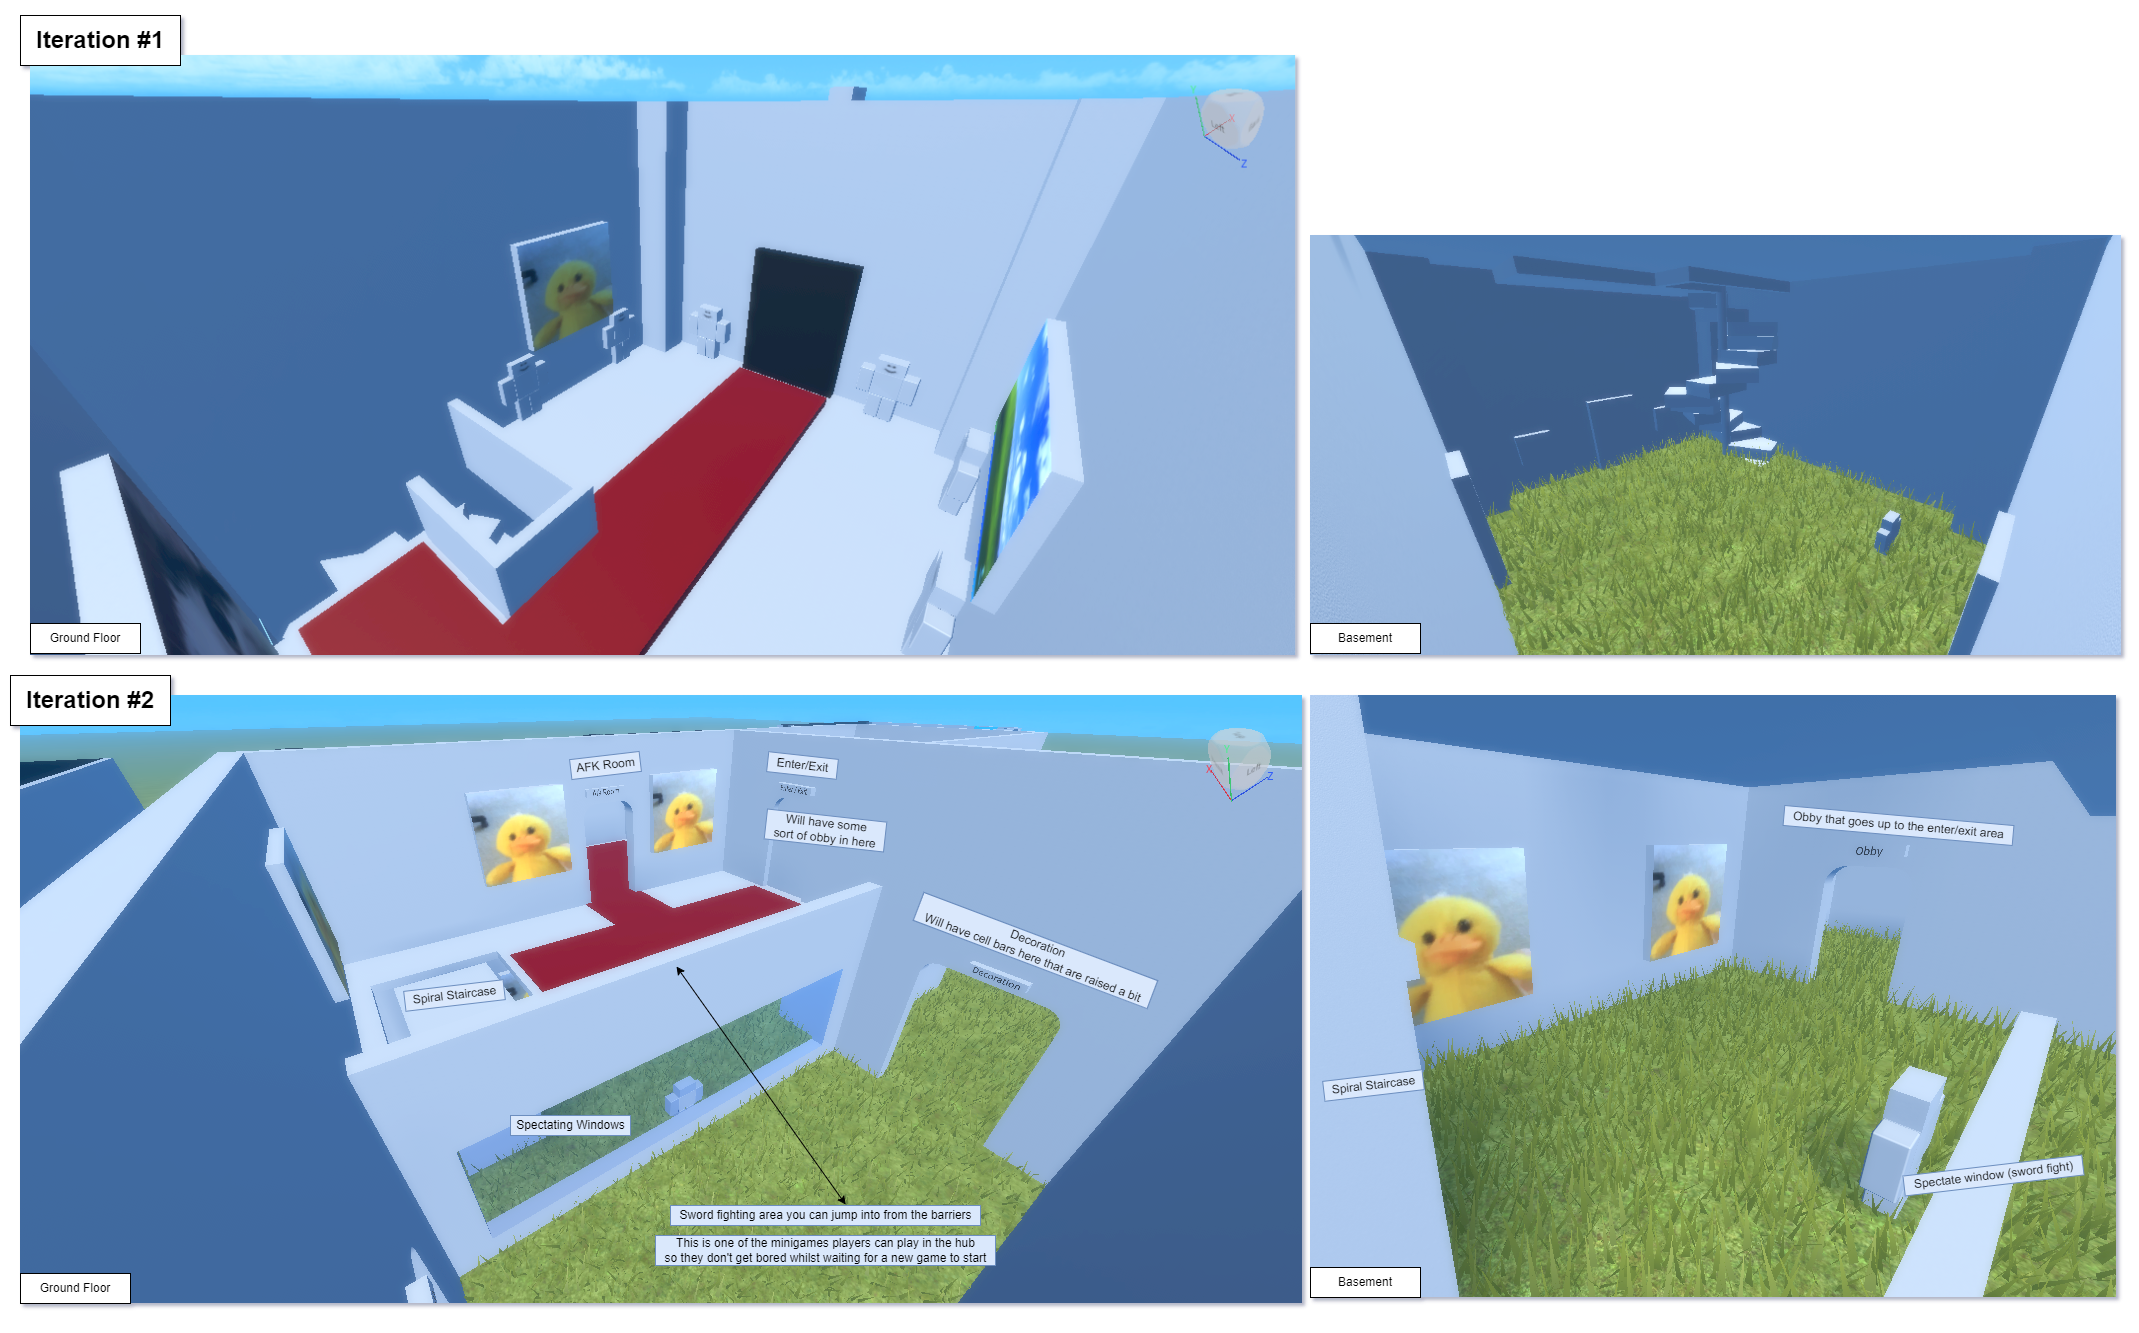
Thomas wanted it that the player can enter the castle, similar to how the player enters the indoors of the hub in the game Flood Escape, mentioned before - He was also inspired by the interior of Lumbridge Castle on OldSchool Runescape, so we looked around at the scenery and took pictures of things that Thomas wanted in his hub!
Just like the grey boxing for the outside hub area, we made multiple of the indoor hub worlds, talking about the pros and cons of each of them to improve upon iteration, and throughout the grey boxing, we were discussing what he was putting into the hub and why.
And because this indoor hub had different doorways, I proposed the idea of annotating the area, just so we don’t forget what leads where!
Thomas ended up being happy with the second iteration of the indoors hub that he made, and so we finished there!
Greybox For City
Out of the three main maps that he wanted to make for his game, we decided to do the City first, and he started this by putting down some blocks in the size of the map which he wanted and spawning our players in to see if it felt like the right size.
One of the most important things about these maps is to not make them too big, if they’re too big, the players won’t be able to navigate around them well when they’re hiding as props, and lots of space would have to be filled up so it doesn’t feel empty, but if it’s too small, there wouldn’t be enough places to hide.
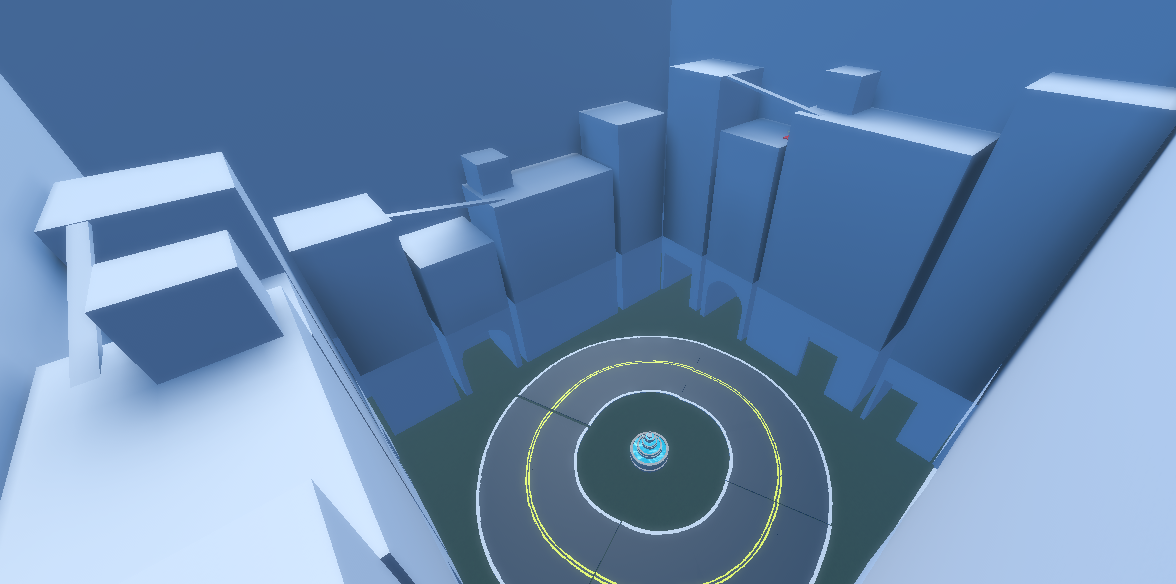
And so once Thomas found a size he was happy with, we began looking into the city pictures which he put onto the Game Design Document, and began to block out where he wanted the roads and buildings, he also decided that he wanted this to be a city at night, so he made a night sky with shining stars in it, and put it on the roof.
And just like the other grey boxes, we spawned into the city, had a look around and talked about the pros and cons, and then worked on the final iteration of the city.
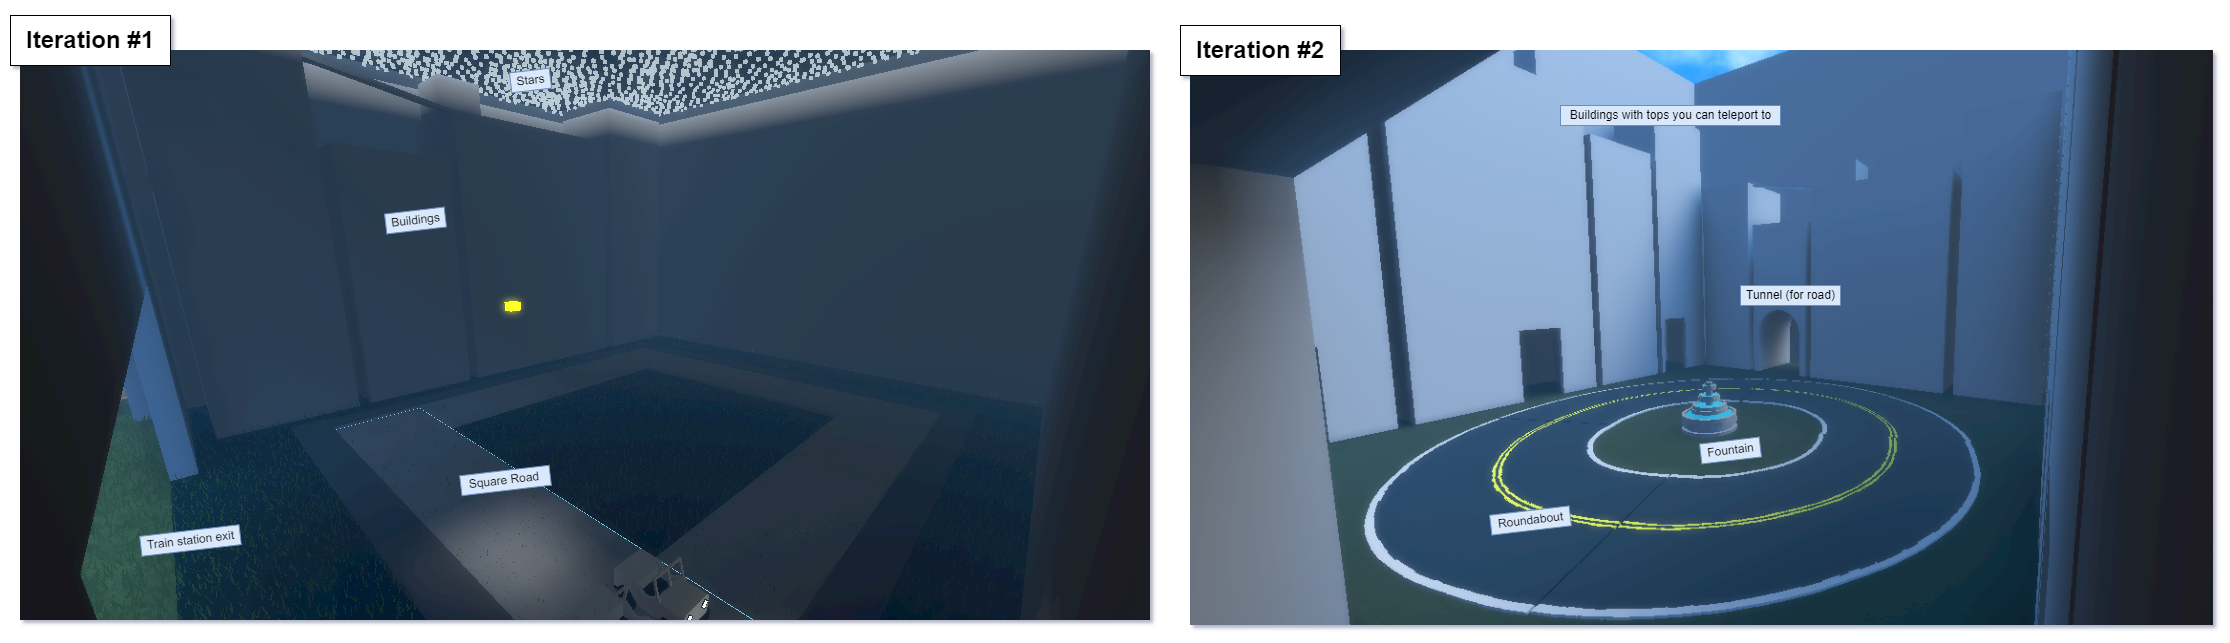
Whilst Greyboxing the city, I took a screenshot of what we had of this second iteration of the city, and drew over the top of it, to show Thomas another way we can plan out the city and everything inside of it, and this is what Thomas did!
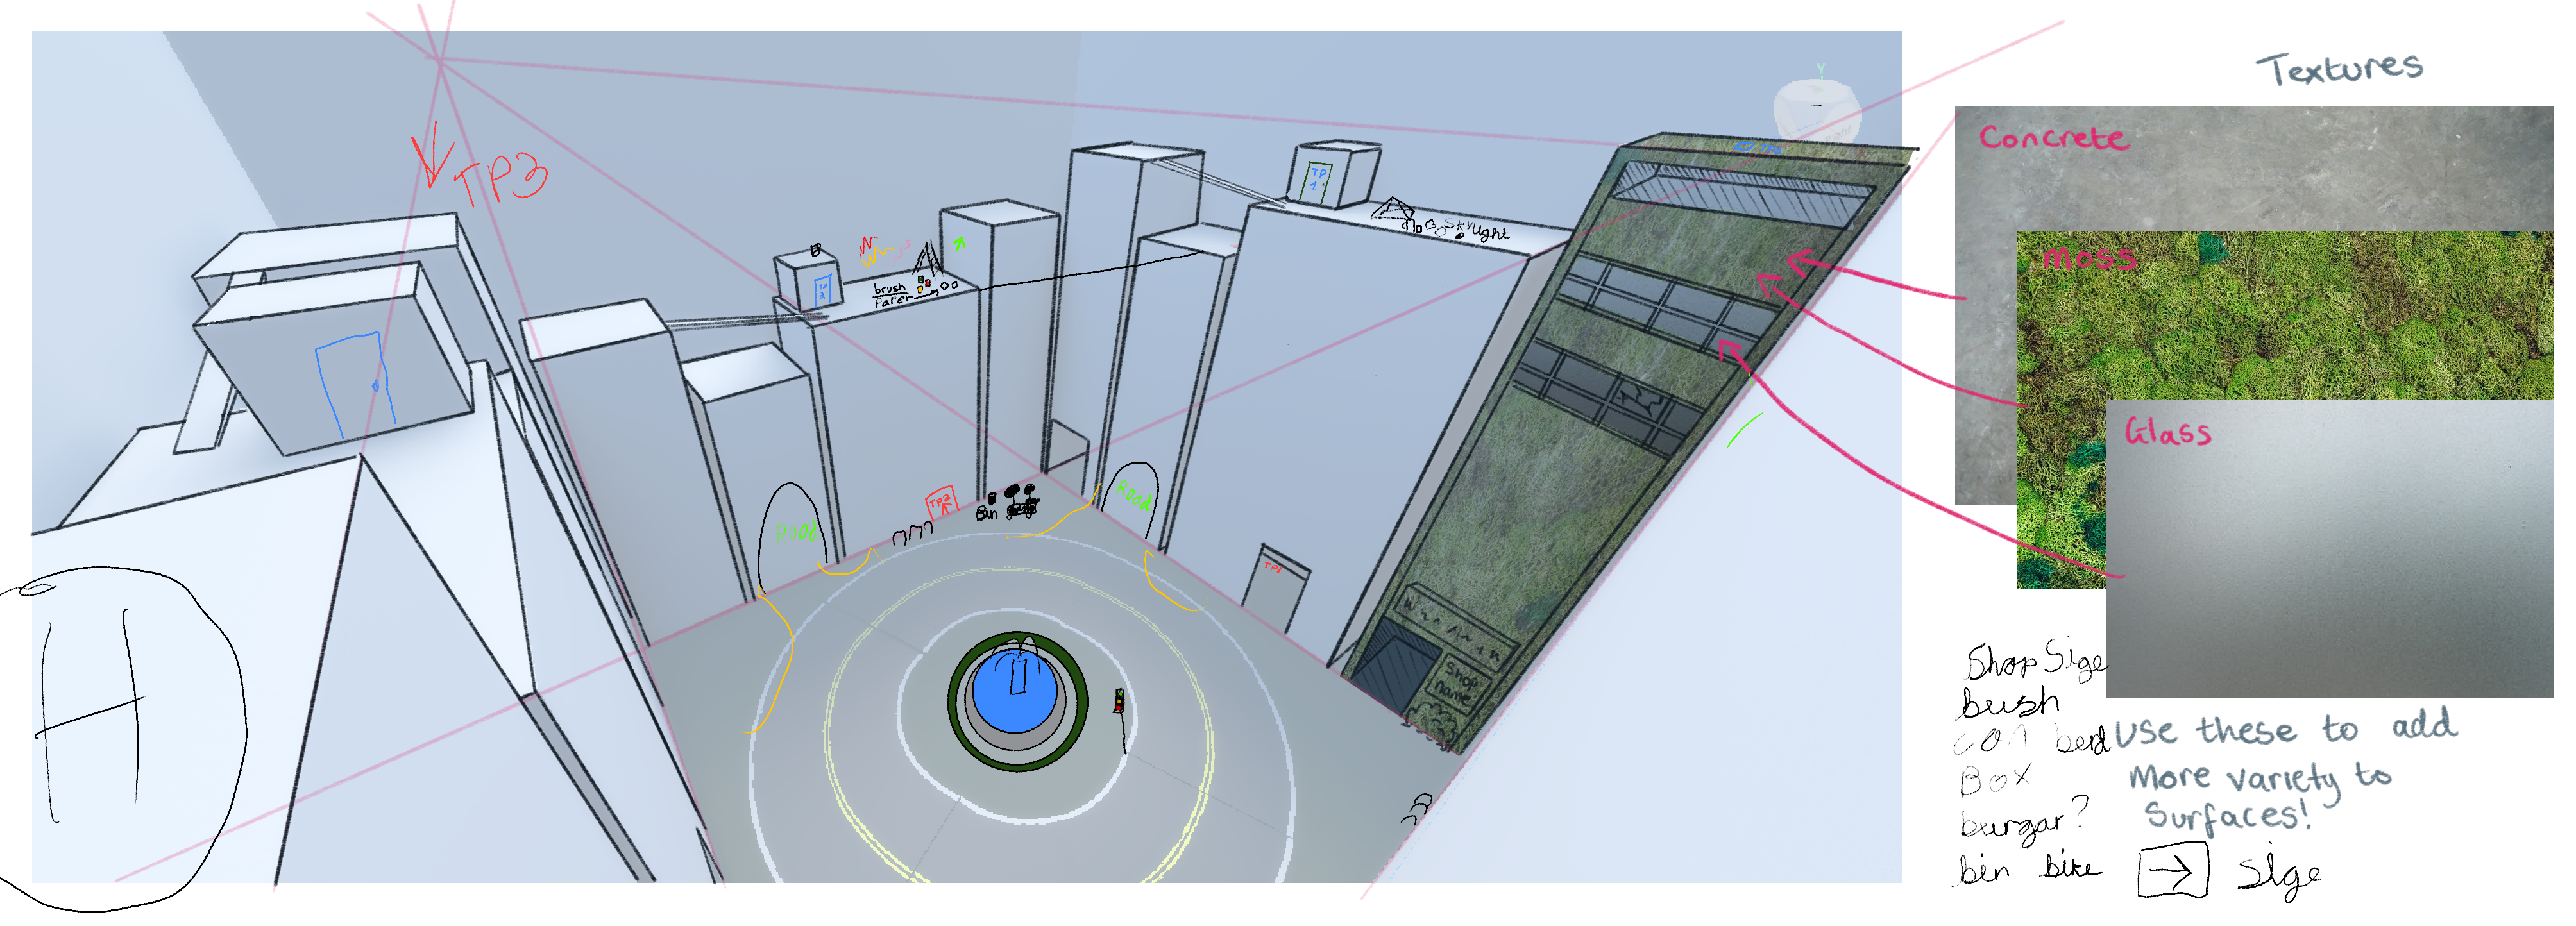
In this concept, he drew out a big fountain in the middle of the round road, as well as some traffic lights, he also added to the road so it would make more sense that the road goes into the tunnels which are built into the buildings!
We also talked about things he can add which we would be able to put props around for players to disguise as and blend in! So, in the concept art, there is a building with a skylight which you can secretly enter into, and then right next to that, some shoes, and bits of trash, as if someone was sitting up there and left behind stuff, so the players can disguise themselves as the shoes or the trash, and they can also go into the skylight which would lead into a room which had lots of different props!
On the other building in the middle. we have some brushes and paints, as well as a ladder that leads onto the top of another building, where a person would’ve been doing some street painting, and the player would be able to disguise themselves as a paint bucket, or anything a painter might leave behind!
There is also a helicopter pad on the top of a building! We didn’t have many ideas for this yet though, but maybe there could be a helicopter flying through the city which the player can hide in!
On the ground, we have bike bars, and some cafe tables and chairs with umbrellas over them, so there will be some coffee cups as props too!
There’s more which we can add in, but we left it there for now!
Prototype Prop Script
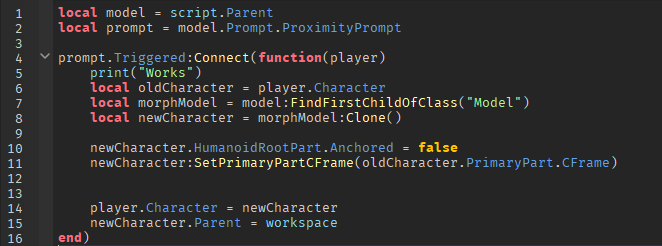
Thinking ahead, I spent some of my own time working on the main mechanics for the game, the prop swapping. Currently, we aren’t at the stage to start adding mechanics into the game, but I was still new to Lua, and that language is used for Roblox games, so I had to get some practice in it!
After some messing around and looking through the documentation, I was able to get the player to turn into a fish model! Or, whatever model they wanted to turn into, and the process of making mechanics and programming in Roblox is very similar to what I’m used to in engines like Unity and Unreal Engine.
Conclusion
As we were taking our time on greyboxing and design, I decided it was best if we stopped the greyboxing in the city, and leave the space and underwater greybox for later on, so we can focus on refining the hub world, the city, and prototyping mechanics for the game. I didn’t want it to be too overwhelming for Thomas.
I’m really happy with how the greyboxing turned out! The outdoors hub world is my favorite, Thomas has done such a great job!
I also discussed with him what he thinks of the game so far, and he said that he wanted to try out some other game ideas! So, I will be restructuring our sessions a bit so we can do something like a mini-gamejam each session to try out other game ideas! This prop hunt game will be put on the side for now as we try out some other ideas using different tools outside of Roblox!